|
|
||||||
|
|
|
|
Download | |||
Diamond Version 5 User Manual: Automatic, assisted, and manual picture creationAuto Picture CreatorThis docking pane automatically applies changes in building options, picture design and viewing direction directly to the structure picture
This article is about:
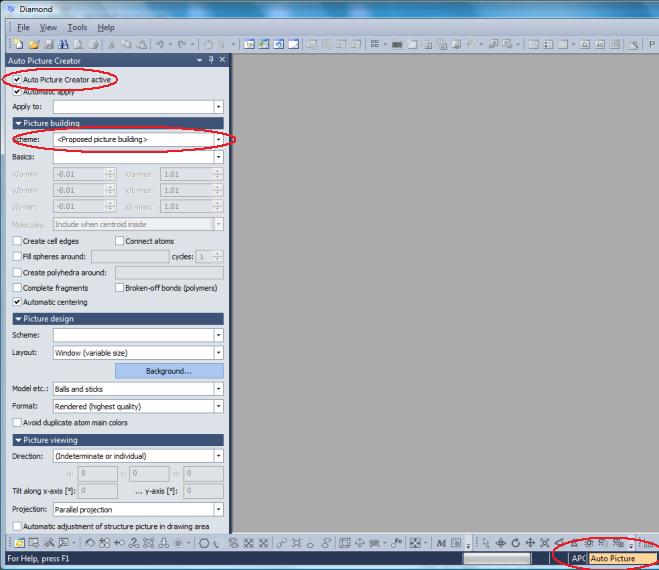
Previous article: Picture Creation Assistant The "Auto Picture Creator" window is usually docked at the left side of the Diamond application window and offers the most useful features in the categories picture building, picture design and picture viewing at a glance. Its starting position and handling is similar to the Navigation window. Like that it can be docked, floating or completely hidden. Additionally it can reduce its size to nothing but the tab -- enabling quick reappareance when mouse over. This is useful when your screen size is limited due to open data sheet or other windows or panes. The activity status of the Auto Picture Creator is signalled with the yellow-orange field in the middle of the status bar.
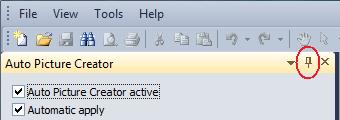
To show the Auto Picture Creator docking pane, use the command Auto Picture Creator from the View menu. (Or use the command Use Auto Picture Creator in the Picture menu to show and activate the docking pane directly.) Maybe the docking window is not wide enough to show all controls. If so, move the mouse cursor to the right edge of the docking window and shift the edge with left mouse button pressed to make all controls visible. Since you may have altered some of Diamond's (default) settings, we now manually switch the "Auto Picture Creator" to "<Proposed picture building>". Open the "Auto Picture Creator" (unless already open) via the Auto Picture Creator command from the View menu. Ensure that the pane is docked by clicking on the pin symbol. (If it is already docked and you press the pin symbol, the docking window will hide - except the title - at the left side of the Diamond application window.)
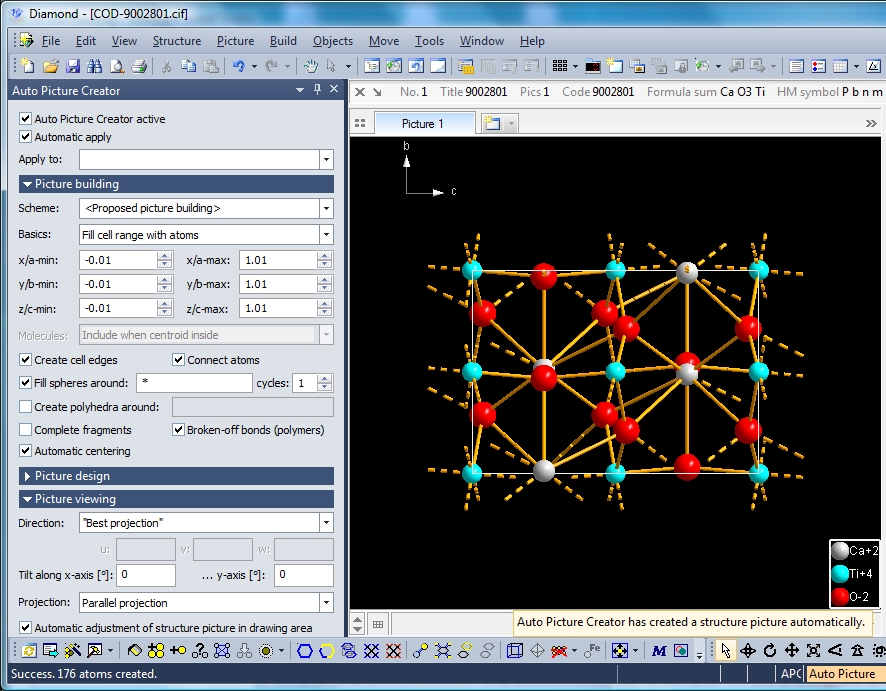
Opening a CIF file and applying Auto Picture Creator settings Since the Auto Picture Creator does not apply to already existing structure pictures (i.e. when you open a Diamond document), we take a CIF file as sample: COD-9002801.cif, a perovskite sample from American Mineralogist Crystal Structure Database (AMCSD).
In the Auto Picture Creator docking pane, ensure that: Note: In Diamond version 4, the "Auto Picture Creator" was active by default. In version 5 it is not. So take care to set the checkmark at "Auto Picture Creator active". Now open the sample file "COD-9002081.cif" through the File/Open... command. A structure picture is generated automatically with the settings that Diamond assumes best after a quick analysis of the chemistry and structure of the compound. (That is the same as the command Picture/Create Proposed Picture would create.) The "proposed picture building" settings are automatically filled into the "Auto Picture Creator" docking window's controls. (Note: "Picture design" category collapsed for brevity.)
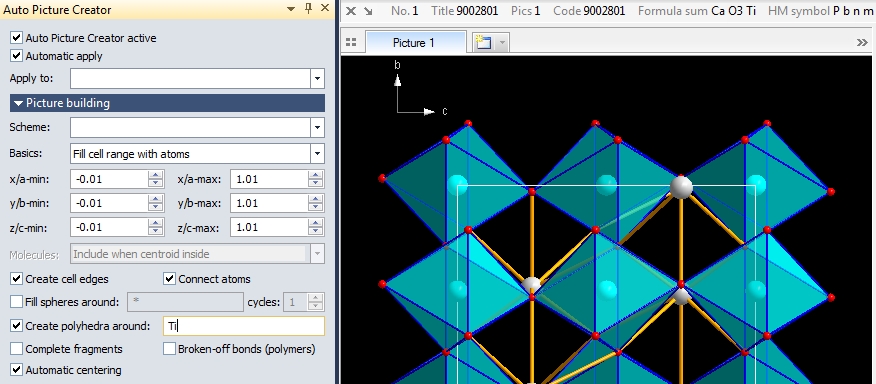
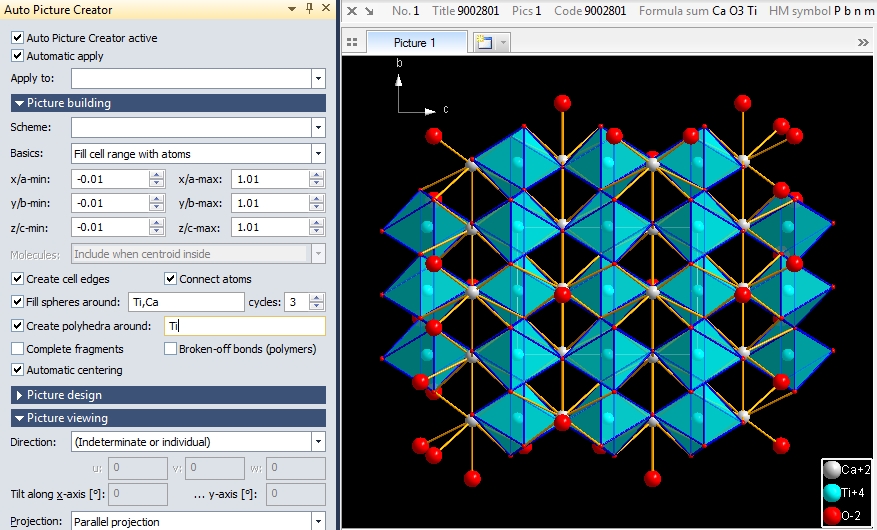
As you can see from the screenshot above, the proposal Changing (and automatically applying) settings in the Auto Picture Creator So you have a starting point to adjust the settings to override what Diamond has suggested. You can simply switch "Connect atoms" on or off, add or remove polyhedra, or increase or decrease the cell range. We now remove the checkmark at "Fill spheres around" and "Broken-off bonds (polymers)" in order to have no broken-off coordination spheres but create coordination polyhedra around all Ti atoms by setting a checkmark at "Create polyhedra around" and entering "Ti" into the associated input field:
Note that the combobox "Scheme" has turned to blank, since the current settings do not more correspond with Diamond's previous proposal.
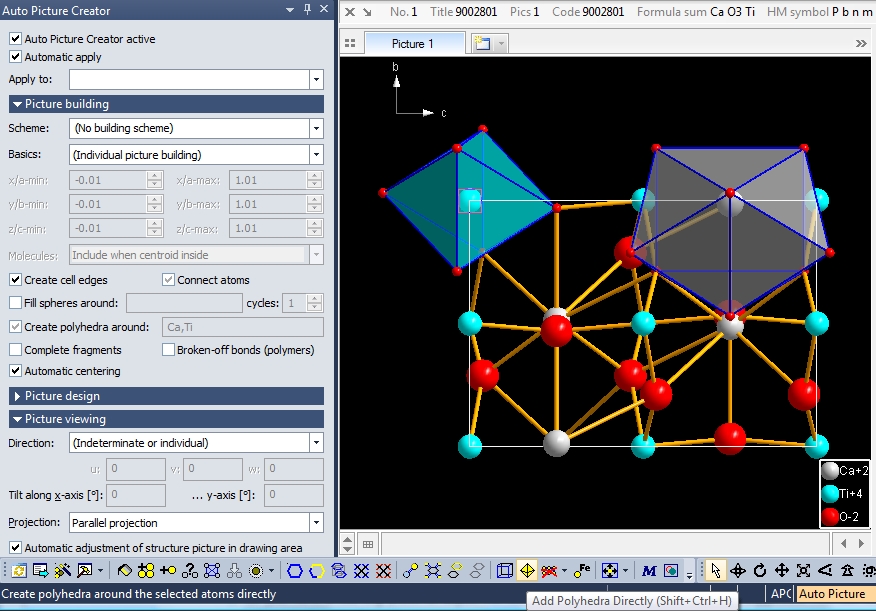
Reflection of manual changes to the Auto Picture Creator For the example below, we removed the polyhedra (by removing the checkmark at "Create polyhedra around"), then marked one Ca and one Ti atom each and created two polyhedra, using the Add Polyhedra Directly button in the bottom toolbar. (Note that the checkmark at "Create polyhedra around" is grey, meaning it is in the indeterminate state, since not all Ca and Ti atoms are centers of coordination polyhedra.)
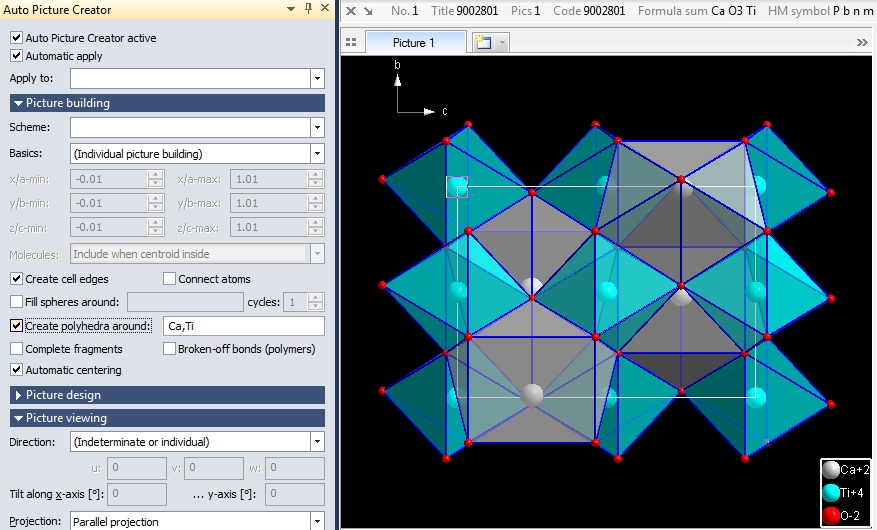
You can click on "Create polyhedra around" again to create polyhedra around all listed (here: Ca and Ti) atoms (picture below) or remove all polyhedra with a second click (which clears the checkbox).
Some of the common building functions reflect in the Auto Picture Creator rather than simply setting "Basics" to "<Individual picture building>". So you can run commands from the Build menu (or the corresponding icons in the toolbar or accelerator keys) or directly enter the options in the Auto Picture Creator docking window. Do the following and watch the changes in both structure picture and Auto Picture Creator:
(1) Run command Build/Destroy/Destroy All (or Shift+Ctrl+D): This clears both
structure picture and most Auto Picture Creator settings.
When you close the document, the Auto Picture Creator holds the current settings, so that on a later re-opening of 9002801.cif creates the same structure picture building. (Design and viewing settings may be different later.) Or you can apply this picture building to other similar structures. Add more elements in the input fields for coordination spheres and/or polyhedra to make other elements than only Ca and Ti centers of spheres and/or polyhedra. Reference: COD:9002081: CaTiO3 in Pbnm (62) - orthorhombic. a=5.4043 Å b=5.4224 Å c=7.6510 Å. From: Yamanaka, T.; Hirai, M.; Komatsu, Y. Structure change of Ca1-xSrxTiO3 perovskite with composition and pressure Sample: CaTiO3, x = 0.0. American Mineralogist, 87, 1183-1189 (2002).
Previous article: Picture Creation Assistant
|
|
Page last modified September 18, 2023. Copyright © 2023 Crystal Impact GbR. All rights reserved. Contact Webmaster |