|
|
||||||
|
|
|
|
Download | |||
Diamond Version 5 User Manual: Automatic, assisted, and manual picture creationOptimizing the Representation of the Structure Picture
This article is about:
Previous article: Definition and application of "design schemes" (style sheets) Different Targets to Optimize for
The expression of a structure picture appears quite different dependent on the output device. A rendered picture on the screen (with dark background) may give quite impressive results, whereas the printout of this picture on a black-and-white printer (with white background) will look rather modest.
For different output devices, Diamond offers several functions to optimize the structure picture:
Rendered representation
In most cases, rendered representation yields the best result for a structure picture, especially when dark background is used. If you print such a picture on a normal black-and-white printer and use the default setting (which does not cover the background of the printout with the original dark background color of the screen), the result may be disappointing. The main reason is that rendered representation uses no edges, and that will lead to low contrast between the white background and the grey-rasterized objects. You will get better results on a color printer - even on white background -, but the best results on a high-end color printer, such as a thermo-sublimation printer, when you use the original background color. For that, you must switch out the default setting "Print black-on-white", which uses black-on-white mode by default for printing.
Colored flat representation
If you use flat representation, you may need auxiliary effects to enhance the 3D impression of the results on screen or printout. If you make use of objects filled with colors, especially atoms and thick bonds, you need to define a (dark) edge for a better contrast between white background and the interior colors of the objects, especially if you convert this graphics to black-on-white later.
Diamond offers several options to represent a flat colored picture:
- with light bulbs for a lighting impression on atom spheres.
- dito, but without light bulbs.
- dito, without light bulbs, and with black edges.
The third of these options (introducing black edges to the objects) is quite good for gray-scaled printouts on a black-and-white printer of color printouts on a color printer.
Gray-scaled output
Diamond can convert the colors used to fill atoms, thick bonds, and polyhedron faces to gray tones with the corresponding brightness. All lines will become black. If objects have no edges already, they will get black edges.
Pure black-and-white representation
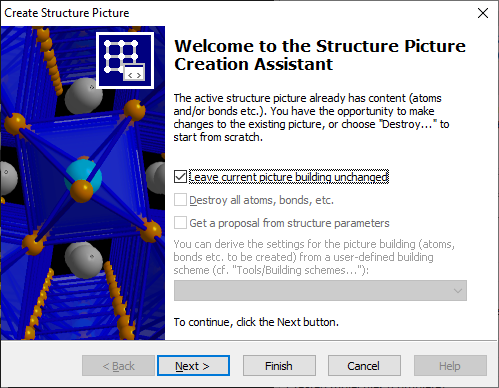
Using the Structure Picture Creation AssistantIn general, you can choose on the welcome page of the Structure Picture Creation Assistant, if to create a (new) structure picture from scratch or to modify an existing one. When you run the command Picture -> Picture Creation Assistant for an already existing structure picture, the checkbox Leave current picture building unchanged is checked by default. And as long as you do not clear this checkmark, the following settings Destroy... and Get proposal... are not available.
With the Leave current picture building unchanged checkmark set, the current structure picture building will be left unchanged and the Next button will forward you directly to the design page of this assistant.
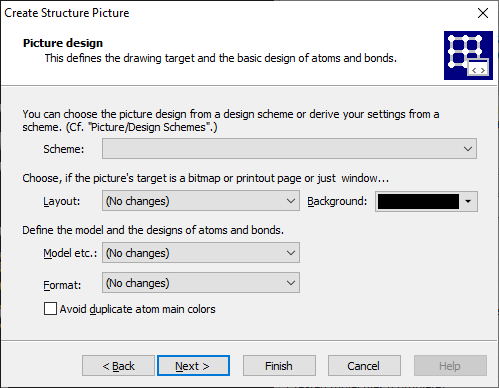
To avoid making unwanted changes to your picture, all settings are initially set to "(No changes)". Now you can choose which settings you want to change: You can change the Layout to regular "window" (the drawing area simply refers to the size of the structure picture pane on the screen), or to "bitmap" (with a defined resolution) or to "printout page" (e.g. "A4" or "Letter" with white background and automatic color set to black). With Model etc. you can quickly switch between regular ball-and-stick, wires, sticks, space-filling, or ellipsoid representation. Define the type of atom, bond, etc. designs the structure picture will have with the Format combobox:
You can also apply the Avoid duplicate atom main colors option. If this option is checked, Diamond will try to find different atom colors for each atom group. Note that changing the "format" of the picture with the assistant, e.g. from colored to a grey-scaled or black-on-white representation also changes the design settings for the atom groups and sites and the bond groups as well as the default polyhedron design. The settings concerning the viewing direction as well as the settings for the legend (of atom groups) and the coordinate system (showing the current orientation) on the following two pages of the Picture Creation Assistant are also set to "(No changes)". So you may continue to the next pages using the Next button and make changes where necessary. But you can also finish here from the design page using the Finish button when you are done with the changes.
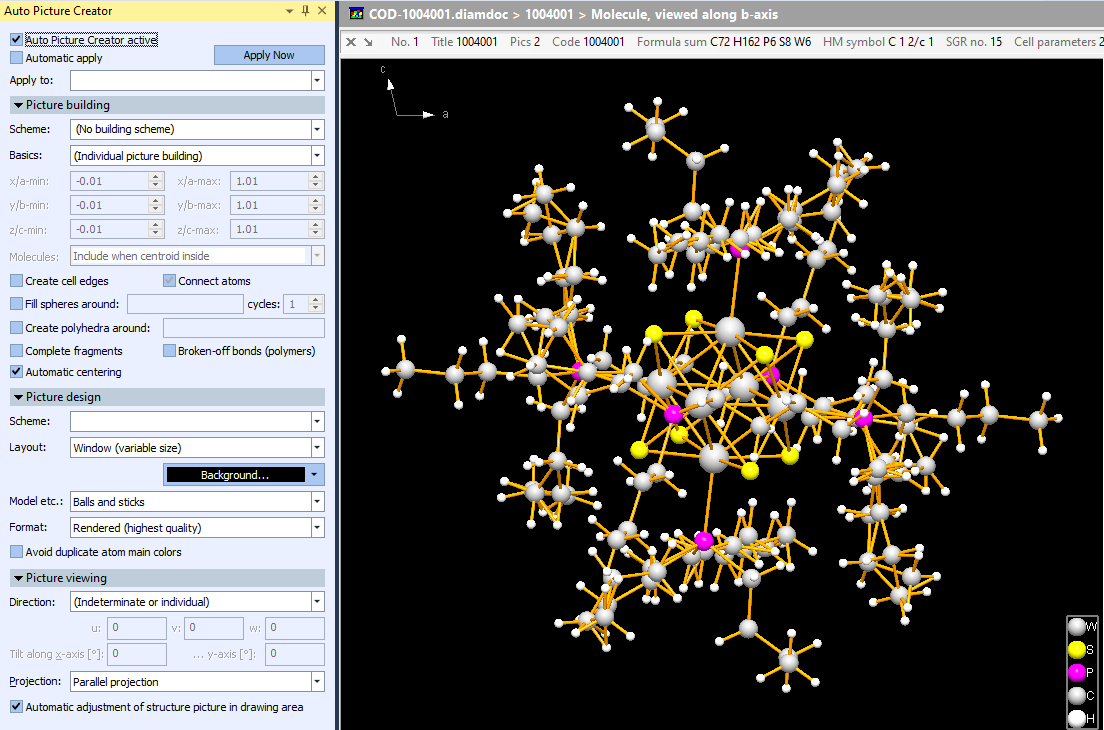
Using the Auto Picture CreatorThe Auto Picture Creator has the advantage that the changes you make immediately are depicted in the structure picture, presupposed you have activated the Automatic Apply checkbox in the Auto Picture Creator docking window. Activating the "Auto Picture Creator" for the sample picture "COD-1004001.diamdoc" using the Picture -> Use Auto Picture Creator command comes up with a checkmark at Auto Picture Creator active but with the checkmark at Automatic apply cleared:
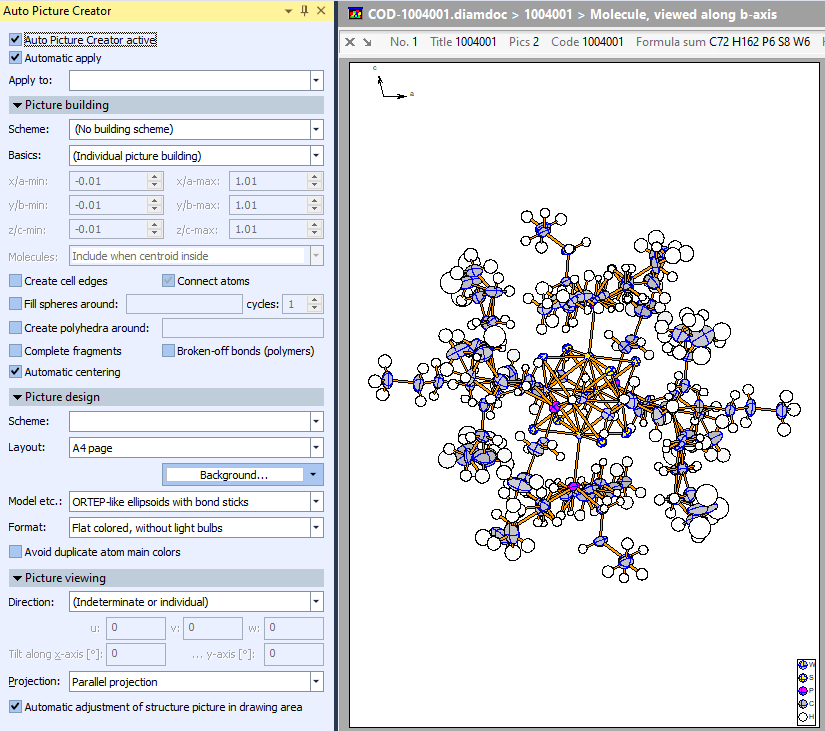
The settings in the Picture design category refect the settings stored in the sample document: Window layout, ball-and-stick model, and rendered representation. We want to change this picture just like in the sample used in the article "Definition and Application of Design Schemes": "Scenario 2: Quick definition and application of a design scheme". Before you start making changes in the Picture design category, assure that the settings in the Picture building section are set to "(Individual picture building)". Changes can be applied automatically whenever you choose a different setting, if the Automatic apply checkbox is activated, or via the Apply now push button, if not. We change the following settings: The result is shown in the screenshot below:
Previous article: Definition and application of "design schemes" (style sheets)
|
|
Page last modified October 01, 2023. Copyright © 2023 Crystal Impact GbR. All rights reserved. Contact Webmaster |